EN 13823 Single Burning Item Sample Installation Guide
This guideline is only used to guide testing personnel in installing SBI specimens. Users need to comply with the requirements specified in the standard when using this guide.
When the customer proposes to install in their end use application, the customer needs to provide installation drawings, and the laboratory will install and conduct tests based on the drawings.
Testers install the samples according to the information sheet and standard clause 5.2.2. When installing the sample, attention should be paid to the selection of substrate, ventilated cavity (cavity width, open connection), and the use of removable panel parts (clause 4.4.11 in the standard) . The installation details of common samples in the laboratory are as follows:
a) Non substrate free stranding board: generally made of rigid material excluding floorings, the installation sample is 80mm away from the backboard and installed directly;
Boards that have in the end use application a ventilated cavity behind it shall be tested with a cavity of 40 mm width as well as with the smallest possible cavity width in the end-use application. And it can be installed directly;
Boards that have in the end use application a ventilated cavity behind but without substrate, such as screen and curtain products, lightbox fabrics, projection fabrics, etc., for hanging installation, as shown in the following figure:
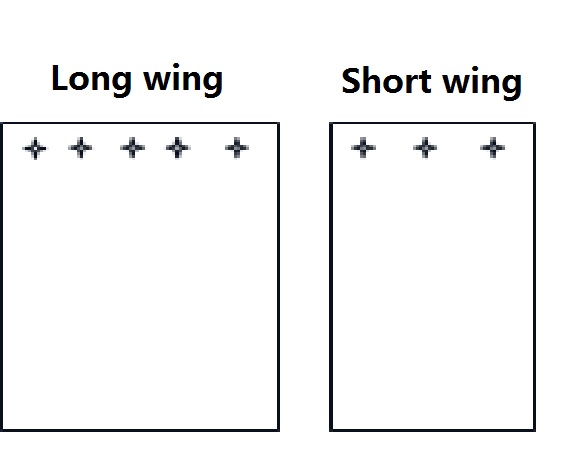
"+"For the perforation position on the sample, the hole spacing is equal
Connect thin steel wires at the perforation position and fix them on the frame of the trolley. The lower end is fixed on the trolley platform with heavy objects such as bricks (this type of sample is about 15cm longer than the conventional sample when cut).
b) Fixed mechanically to a substrate: generally made of softer materials excluding floorings (not wallpaper, foam).
Mounting of specimen can be done using screws and clips, or according to customer requirements.
Fixing method: screws, as shown in the following figure:
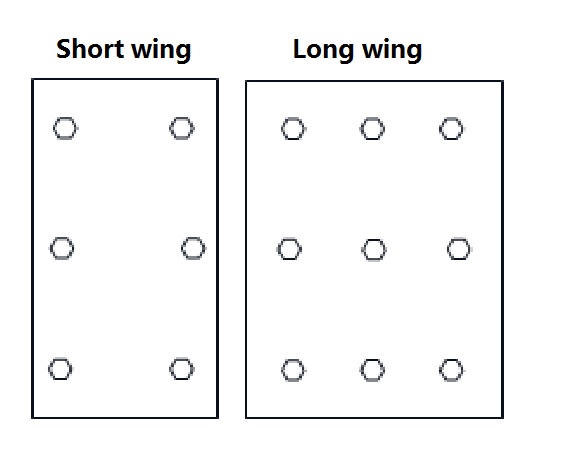
"O" The screws is located about 10cm from the edge, and the distance between the middle screw and the screws on both sides is equal.
Fixing method: clips, as shown in the following figure:
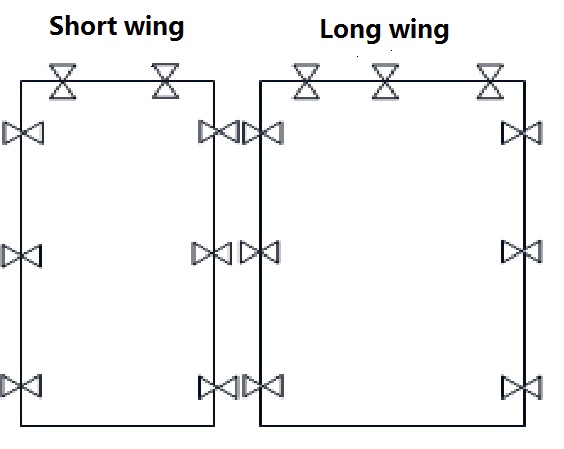
"△"The binder clips is located about 10cm from the edge, and the distance between the middle clips and the clips on both sides is equal.
c) Fixed mechanically to a substrate with a cavity behind it:
The distance between the substrate and the backing boards is 40mm.
The method of mechanically fixing the sample to the substrate is shown in b), and the method of attaching the sample to the substrate is shown in d)
d) Products that glued to a substrate:
Generally made of soft materials like wallpaper or foam excluding floorings.
The adhesive is provided by the customer.
When customers choose "ordinary adhesive", take an appropriate amount of adhesive and evenly apply it to the substrate board, so that the sample can be firmly attached to the substrate.
When customers choose "special adhesive", calculate and weigh the required adhesive mass based on the provided adhesive coating density, evenly apply it to the substrate, and then glue the sample to the substrate.
After the pasting is completed and naturally dried, check whether the sample is firmly pasted, and then place the sample in a constant temperature and humidity room for pre-treatment according to standard requirements.
e) Products tested with a horizontal joint:
The horizontal joint is set on the long wing of the sample, 500mm away from the bottom edge of the sample, as shown in the following figure. Or according to the customer's requested height.
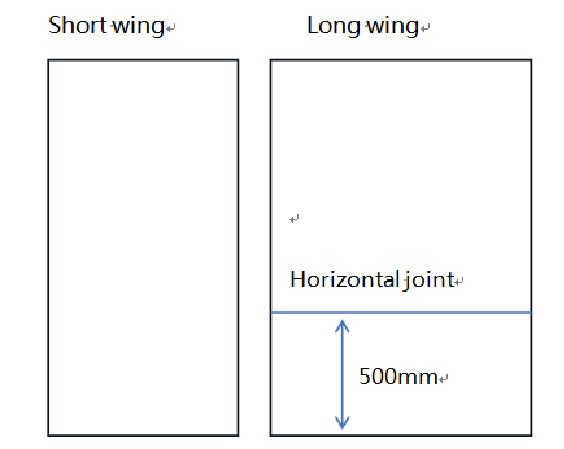
Products tested with a vertical joint: The vertical joint is set on the long wing of the specimen, and is 200mm away from the corner line, as shown in the following figure. Or according to customer requirements.
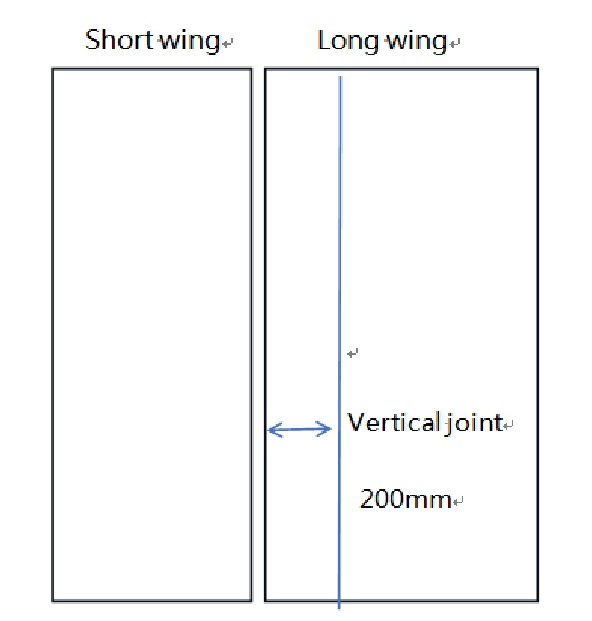
f) Non-flat products:
Non-flat products shall be tested in such a way that not more than 30 % of a representative area of 250 mm by 250 mm of the exposed surface area is more than 10 mm behind the vertical plane through the rear side of the U-profile.Otherwise, during installation, cut off a layer in the 90mm area above the bottom of the products (the distance between the concave part of this area and the vertical surface behind the U-shaped card slot after cutting is 10mm, as shown in the figure below), so that the products extends out of the U-shaped card slot to the side of the burner to meet the requirements.A product shall not extend over the burner (i.e. maximum extension over the U-profile is 40 mm).
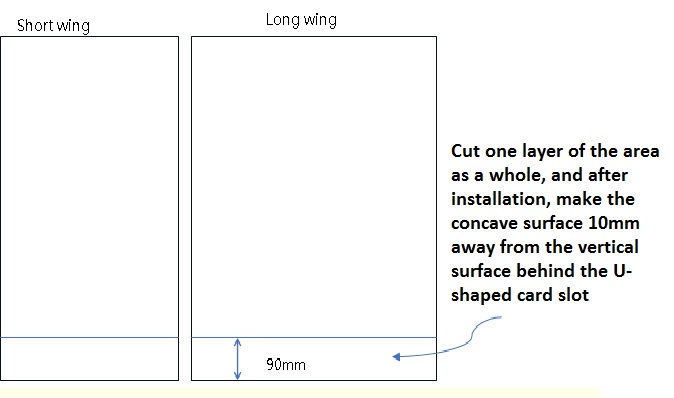
Common products such as sound-absorbing panels and grille decorative panels, such as the grille decorative panel below (with a surface protrusion of 18mm), will be installed by cutting off the sample with a thickness of 8mm in the 90mm area above the bottom of the sample, so that the sample extends out of the U-shaped slot for installation. The concave surface is 10mm away from the vertical surface behind the U-shaped slot.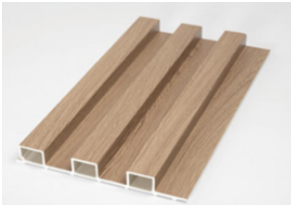
g) Fixing of pipe insulation test specimens:
The fixing of pipe shall be in accordance with clause 5.2.3.8 of EN 15715-2009.
The laboratory is equipped with standard steel pipes (outer diameter 21.3mm) and metal frames (used to fix steel pipes and pipe). The standard size pipe (inner diameter 22mm) is installed on the steel pipe, and then fixed to the metal frame with steel wire at the top of the pipe (note: the pipe is installed from the corner line and arranged at equidistant intervals to the outside). The distance between the fixed outer surfaces of the pipe and the backing board is 25mm. If the length of the pipe is less than 1500mm, the pipe should be combined together and there should be a joint at a height of 500mm. The quantity and installation diagram of pipe installation are shown below:
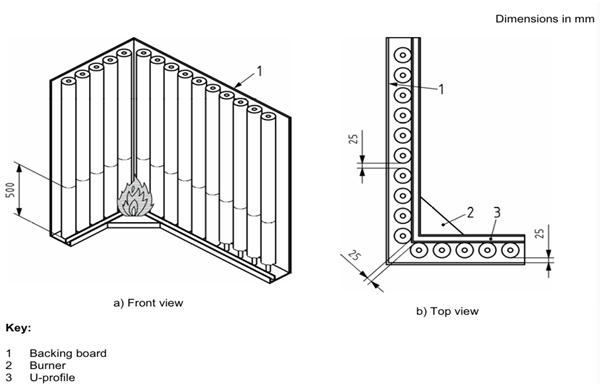
| Pipe thickness | Pipe numbers on short wing | Pipe numbers on long wing |
| 25mm | 5 pieces | 10 pieces |
| 50mm | 3 pieces | 6 pieces |
| 75mm | 2 pieces | 5 pieces |
Note :When customers provide pipes with other inner diameter sizes, they need to provide matching steel pipes.
h) Mounting the other small samples: For smaller samples, customers can assemble them themselves or the laboratory can assemble and mount them according to customer requirements.